
상권's
TIL 39 (sequelize, ORM) (2021.11.18) 본문
문제
정수를 요소로 갖는 배열을 입력받아 이진 힙(binary heap)*을 리턴해야 합니다.
이진 힙(binary heap)은 노드의 값이 특정한 순서를 가지고 있는 완전 이진 트리(Complete Binary Tree)입니다.
완전 이진 트리는 이진 트리의 (마지막 레벨 또는 마지막 깊이를 제외하고) 모든 레벨이 노드로 가득 채워져 있어야 합니다.
마지막 레벨은 왼쪽부터 차례대로 채워져 있습니다.이진 힙에서 부모 노드의 값이 (이진 트리이므로 2개의) 자식 노드의 값보다 큰 경우를 최대 힙(max heap), 반대의 경우를 최소 힙(min heap)이라고 합니다.
주의사항
최대 힙(max heap)을 구현해야 합니다.
입력으로 주어진 배열은 중첩되지 않은 1차원 배열입니다.
최대 힙 구현을 위해 선언된 함수들(getParentIdx, insert)을 전부 완성해야 합니다.
swap, getParentIdx, insert를 전부 사용해야 합니다.
swap, binaryHeap을 수정하지 않아야 합니다.
테스트 케이스에서 힙 함수들을 정확히 구현했는지 함께 테스트합니다.
insert의 시간 복잡도는 O(logN)입니다.주어진 배열을 내림차순으로 정렬(O(logN))해도 최대 힙의 조건을 만족합니다. 하지만 이는 insert를 구현하는 것과는 거리가 먼 방법이며, 테스트를 통과할 수도 없습니다.
// 아래 코드는 수정하지 마세요.
function swap(idx1, idx2, arr) {
  // 두 변수를 바꾸는 방법

  // 1) 임시 변수를 활용한 방법
  // let temp = arr[idx1];
  // arr[idx1] = arr[idx2];
  // arr[idx2] = temp;

  // 2) Destructuring assignment를 활용한 방법
  // arr이 reference type이라 가능
  [arr[idx1], arr[idx2]] = [arr[idx2], arr[idx1]];

  // 3) XOR 연산을 활용한 방법
  // arr이 reference type이라 가능
  // arr[idx1] ^= arr[idx2];
  // arr[idx2] ^= arr[idx1];
  // arr[idx1] ^= arr[idx2];
}

function getParentIdx(idx) {
  // TODO: 여기에 코드를 작성합니다.
  return Math.floor((idx - 1) / 2)
}

function insert(heap, item) {
  // TODO: 여기에 코드를 작성합니다.
  heap.push(item);
  let current = heap.length - 1;
  let parent = getParentIdx(current);
  while (parent >= 0 && heap[current] > heap[parent]) {
    swap(current, parent, heap);
    current = parent;
    parent = getParentIdx(current);
  }
  return heap;
}

// 아래 코드는 수정하지 마세요.
const binaryHeap = function (arr) {
  return arr.reduce((heap, item) => {
    return insert(heap, item);
  }, []);
};
=> 오늘은 일부가 구현되어 있는 상황에서 insert와 gerParentIdx 함수만 구현해보았습니다.
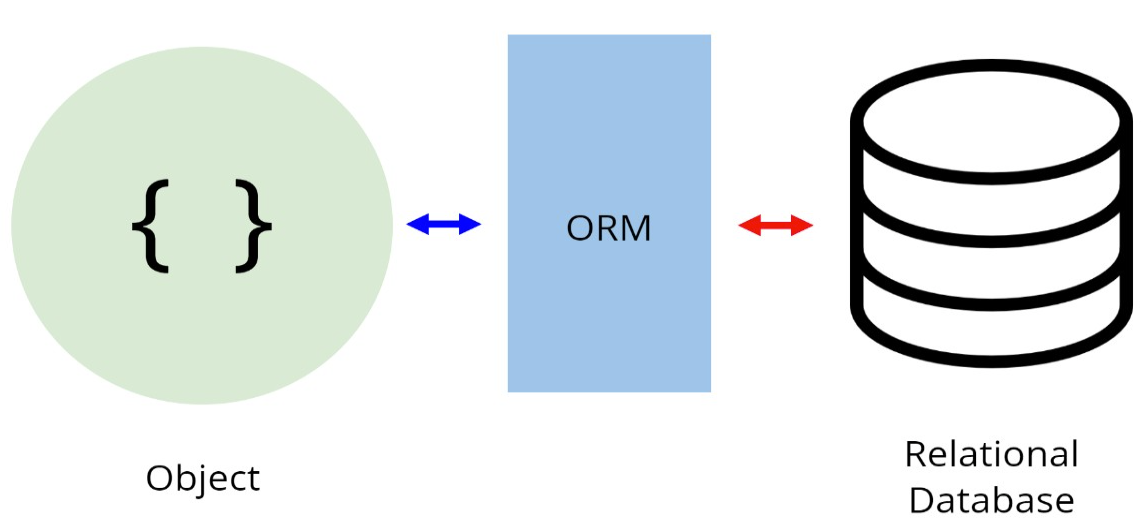
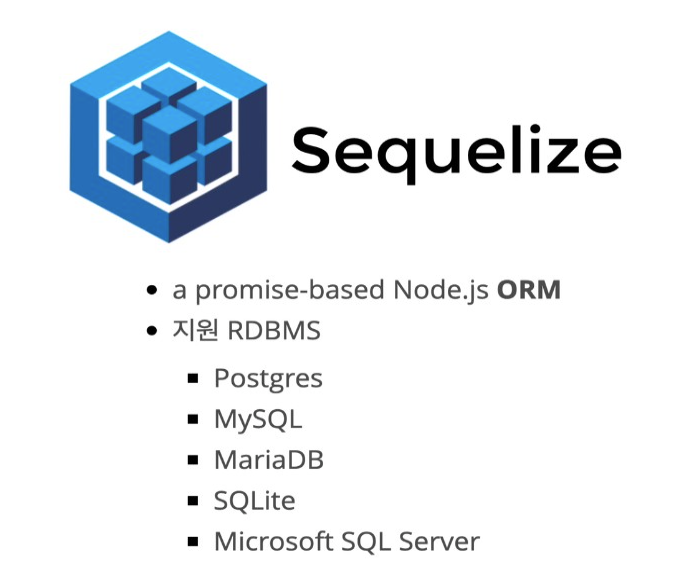
Sequelize 출처
Sequilize는 Postgres, MySQL, MariaDB, SQLite 및 Microsoft SQL Server용 Promise 기반 Node.js ORM입니다. 견고한 트랜잭션 지원, 관계, 신속한 로딩 및 지연, 읽기 복제 등이 특징입니다.
Installing 다운로드
npm install --save sequelize
You'll also have to manually install the driver for your database of choice:
# One of the following:
$ npm install --save pg pg-hstore # Postgres
$ npm install --save mysql2
$ npm install --save mariadb
$ npm install --save sqlite3
$ npm install --save tedious # Microsoft SQL Server
Connecting to a database 데이터 베이스 연결
데이터 베이스에 연결하기 위해서는 Sequelize instance를 만들어야 합니다.
const { Sequelize } = require('sequelize');

// Option 1: Passing a connection URI
const sequelize = new Sequelize('sqlite::memory:') // Example for sqlite
const sequelize = new Sequelize('postgres://user:pass@example.com:5432/dbname') // Example for postgres

// Option 2: Passing parameters separately (sqlite)
const sequelize = new Sequelize({
  dialect: 'sqlite',
  storage: 'path/to/database.sqlite'
});

// Option 3: Passing parameters separately (other dialects)
const sequelize = new Sequelize('database', 'username', 'password', {
  host: 'localhost',
  dialect: /* one of 'mysql' | 'mariadb' | 'postgres' | 'mssql' */
});
오늘 진행되었던 과제는 index.js 에서 일괄적으로 model을 db로 export하고 있어, 필요한 model의 instance는 따로 호출해서 이용했습니다. (Project bootstrapping)
let sequelize;
if (config.use_env_variable) {
  sequelize = new Sequelize(process.env[config.use_env_variable], config);
} else {
  sequelize = new Sequelize(config.database, config.username, config.password, config);
}

.... 중간 생략

db.sequelize = sequelize;
db.Sequelize = Sequelize;

module.exports = db;
findAll()를 통해서 데이터베이스의 테이블을 불러올 수 있습니다.
return
Promise<Array<Model>>
일부 속성에 대해서만 select하길 원할 경우 option을 이용할 수 있습니다.
Model.findAll({
  attributes: ['foo', 'bar']
});
SELECT foo, bar FROM ...
속성의 특정 값만을 찾길 원할 경우는 where 옵션을 사용할 수 있습니다.
Post.findAll({
  where: {
    authorId: 2
  }
});
// SELECT * FROM post WHERE authorId = 2;
오늘 과제에서 findAll을 사용했던 부분입니다. 리턴값이 promise 형태의 배열이여서 변수에 저장 후 바로 response할 수 있었습니다.
  get: async (req, res) => {
    const result = await URLModel.findAll();
    // console.log(result)
    res.status(200).json(result);
  },
UPDATE는 두번째 인자로 들어온 where을 통해서 값을 찾고, 첫번째 인자로 값을 변경할 수 있습니다.
// Change everyone without a last name to "Doe"
await User.update({ lastName: "Doe" }, {
  where: {
    lastName: null
  }
});
URLModel
      .findOne({
        where: {
          id: req.params.id
        }
      }) // findOne의 리턴값은 Promise< Model | null >
      .then(result => {
        if (result) {
          return result.update({
            visits: result.visits + 1
          });
        } else {
          res.sendStatus(204); //204(콘텐츠 없음): 서버가 요청을 성공적으로 처리했지만 콘텐츠를 제공하지 않는다.
        }
오늘 과제에서 update를 사용한 일부분입니다. 코드에서는 findOne을 통해서 정상적으로 처리된 값에다가 바로 update를 사용해서 where 옵션을 이용하지 않았습니다.
destory를 통해서 opttion에 해당하는 부분을 삭제할 수 있습니다.
// Delete everyone named "Jane"
await User.destroy({
  where: {
    firstName: "Jane"
  }
});
findOne(options : object)
findOne은 위의 update 예제에서 사용했던 거처럼 where 옵션을 통해서 해당하는 하나의 값을 찾을 수 있습니다.
Return
Promise<Model|null>
findOrCreate
findOrCreate는 옵션으로 객체를 받는데, where에 해당하는 부분을 찾습니다. 해당하는 인스턴스가 있다면 리턴문의 두번째 인자에 create 하지 않았다는 의미의 false를 리턴을 하고, 인스턴스를 리턴문의 첫번째 인자로 넣습니다.
만약에 where에 해당하는 부분이 없다면, option의 default 객체를 토대로 인스턴스를 생성합니다.
Return
Promise<Model, boolean>예제
  post: (req, res) => {
    const { url } = req.body;
    if (!utils.isValidUrl(url)) {
      return res.sendStatus(400);
    }
    utils.getUrlTitle(url, (err, title) => {
      if (err) {
        console.log(err);
        return res.sendStatus(400);
      }
      URLModel.findOrCreate({ //리턴이 프로미스
          where: {
            url: url
          },
          defaults: {
            title: title
          }
        })
        .then(([result, created]) => { // findOrCreate 의 리턴값은 promis<model, boolean> 이다.
            // console.log('이거는 리절트',result)
            // console.log('이거는 크리에트', created)
          if (!created) { // 있으면 created는 false => 찾은 걸 리턴해준다
            return res.status(201).json(result); // find
          } // created가 true이면 없어서 새로 만들었다.
          res.status(201).json(result); // Created
        })
        .catch(error => {
          console.log(error);
          res.sendStatus(500); // Server error
        });
    });
  },
res.status().end() vs res.sendsStatus
status() sets a HTTP status on the response (as a Javascript object on the server side).
res.status는 서버 사이드에서 자바스크립트 객체로 http status를 설정합니다.
sendStatus() sets the status and sends it to the client. The usage doesn't depend on the HTTP method of the request.
res.sendStatus()는 status를 설정하고 클라이언트에게 보냅니다. res.sendStatus()는 request의 http 메소드에 상관없이 이용할 수 있습니다.
Migrations
Git과 같은 버전 제어 시스템을 사용하여 소스 코드의 변경사항을 관리하는 것처럼 마이그레이션을 사용하여 데이터베이스의 변경사항을 추적할 수 있습니다. 마이그레이션을 통해 기존 데이터베이스를 다른 상태로 전송하거나 그 반대로 전송할 수 있습니다.
이러한 상태 전환은 새 상태로 이동하는 방법과 이전 상태로 되돌리기 위해 변경 사항을 되돌리는 방법을 설명하는 마이그레이션 파일에 저장됩니다.
시퀄라이즈의 마이그레이션은 마이그레이션을 수행하고 실행 취소하는 방법을 지시하는 두 가지 함수를 내보내는 javascript 파일입니다. 이러한 기능은 수동으로 정의하지만 수동으로 호출하지 않습니다. CLI에서 자동으로 호출됩니다. 이러한 기능에서는 속편 제작을 통해 필요한 모든 쿼리를 수행하면 됩니다.쿼리 및 Sequilize가 제공하는 다른 방법을 사용합니다. 그 이상의 마법은 없습니다.
To install the Sequelize CLI:
npm install --save-dev sequelize-cli
Project bootstrapping
To create an empty project you will need to execute init command
cli를 통해 ORM을 잘 사용할 수 있도록 bootstraping(프로젝트 초기 단계를 자동으로 설정할 수 있도록 도와주는 일)을 해줘야 합니다. 아래의 코드를 입력하면 다음과 같은 폴더들이 자동적으로 생성됩니다.
npx sequelize-cli init
This will create following folders
- config => contains config file, which tells CLI how to connect with database
- model => contains all models for your project
- migrations => contains all migration files
- seeders => contains all seed files
모델 만들기
Let's create a model named User.
user라는 모델을 만들고 attributes를 통해서 각 행의 정보를 입력할 수 있습니다.
* 모델명의 단수로 만들고 migrate하게 되면 모델명의 복수형태의 테이블이 만들어집니다.
npx sequelize-cli model:generate --name User --attributes firstName:string,lastName:string,email:string
- Create a model file user in models folder;
- Create a migration file with name like XXXXXXXXXXXXXX-create-user.js in migrations folder.
Migration 시키기 => 테이블 만들기
아래의 코드를 입력하면 테이블을 만들 수 있습니다.
npx sequelize-cli db:migrate
- Will ensure a table called SequelizeMeta in database. This table is used to record which migrations have run on the current database
- Start looking for any migration files which haven't run yet. This is possible by checking SequelizeMeta table. In this case it will run XXXXXXXXXXXXXX-create-user.js migration, which we created in last step.
- Creates a table called Users with all columns as specified in its migration file.
'~2022 작성 글 > TIL' 카테고리의 다른 글
| TIL 41 (sequelize association)(2021.11.21) (0) | 2021.11.21 |
|---|---|
| TIL 40 (NoSQL, MongoDB, Aggregation)(2021.11.19) (0) | 2021.11.19 |
| TIL 38 (과제리뷰, should, supertest)(2021.11.17) (0) | 2021.11.17 |
| TIL 37 (assert, MVC, mocha)(2021.11.16) (0) | 2021.11.16 |
| TIL 36 (sql 과제 풀기, morgan)(2021.11.15) (0) | 2021.11.15 |

